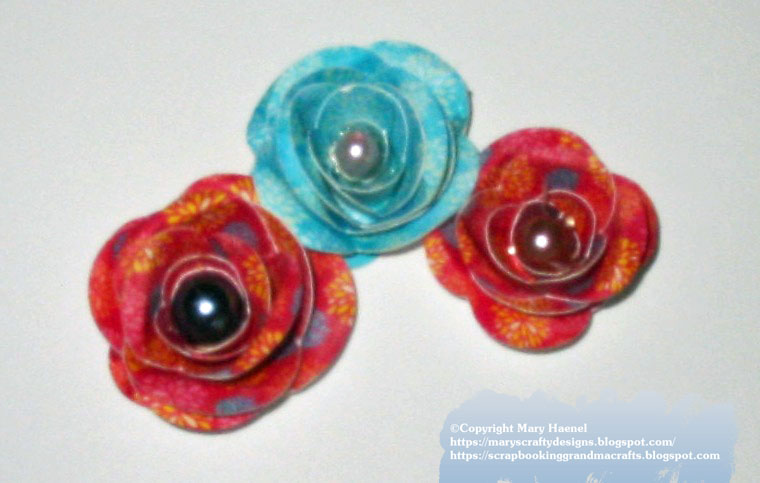
Quote

"Scrapbooking Is Your Own Personal Holiday"~~Sara~~


Thursday, December 29, 2011

Floating Christmas Ornament


Floating Christmas Ornament

Supplies:

Imagine Santa's Village - Santa  cut at 1.139 W x 0.917H
Imagine Santa's Village - Deer cut at 0.694 W x 1.25 H
Trees from Camp out cartridge cut at 1.514 W x 1.375 H
Trees from Christmas Cartridge cut at 1.819 W x 1.361 H
This is a 3" clear plastic ornament. It comes in 2 sections for putting things inside.
I hot glued the pieces in the globe. I used Martha Stewart snow in the ornament.

Wednesday, December 28, 2011

Hope Card


 Hope Card

 Supplies:

Tim Holtz - Sizzix Snowman die
Tim Holtz - Pine tree die
Tim Holtz - Hope movers and shapers die
Tim Holtz - snowflake border die
Liquid applique - Pine Trees
I put Liquid applique on the pine trees then took my heat tool and puffed it up like snow.
The flowers I took a 1-3/4" and a 1-1/4" circle punch and hand cut it into a spiral.
Then rolled up the flowers.

Tuesday, December 13, 2011

Sleigh Treat Holders


Felt Hat Cards


Felt Hat Cards

I am just loving my Cricut Mini and playing with Cricut Craft Room.
These are both made out of felt and glued onto cardstock card.
I stitched it with twine to accent the hats.

Supplies:

The hat is from the Creative Memories Cheerful Seasons cartridge.
The hat is sized in Cricut Craft Room Width - 3.514  Height 5.167 I welded the 2 hats together to form the card.  Then cut the layers in felt.

Monday, December 12, 2011

Pine Cone Topiary


First I gathered up some pine cones around our yard.


Next I bought 6- 4" clay pots


I painted the with Turquoise Apple Barrel Acrylic Paint
that I picked up from Walmart


With The Imagine Snow Angel Cartridge I printed out 2 sizes of snowflakes.
1-1/2" and 2" snowflakes. You can find these snowflakes on page 18 of the handbook.
They did not cut out. I guess it is another gliche with the update.
So I had to hand cut them out.

Before I hand cut the snowflakes out I sealed the paper with Triple-Thick Crystal Clear by Krylon.
I didn't want the ink to run when I used Mod Podge to adhere them to the pot.

Next I applied Mod Podge to adhere the snowflakes to the pot.

After I applied Mod Podge the snowflakes to the pot and they dried I sealed the entire pots with
Triple-Thick Crystal Clear by Krylon. This gave it a nice shine and protects the paper image.
I glittered the rim of the pot with Martha Stewart very fine glitter. Some of the pots I glittered with Martha Stewart Tinsel glitter for a different look.

Next I purchased a 6 pack of 3"styrofoam balls.
I chose my pine cone by selecting the ones that were the same size.
Then I glued them onto the styrofoam balls with hot glue.

Next I weaved some holly ribbon through out the pine cone ball
I found a Walmart.
 I found the berries at Walmart also and cut apart the bouquet for the berries on the topiary.
I inked a dowel rod with brown in for the stem of the Topiary.
I pushed it into the styrofoam ball and secured it with hot glue.
I put styrofoam in the Pots and stuck the dowel into the pots and secured it also with hot glue.


Sunday, October 30, 2011

Halloween Treat Bags And Candy Wrappers


Happy Halloween!!

I've been making some last minute quick and easy treat bags and candy wrappers for Halloween.
These are super easy and fun to make.


This bag was decorated with a pumpkin cute from Smiley Faces Cartridge.
I used felt fusion to decorate the bottom of the bag and ribbon to accent the top.
I put Halloween tissue paper on the inside to finish the look.
I used Micro Bags 4" x 5-1/8" . These are a perfect size for treat bags.


This bag I made a window with the Martha Stewart punch all over the page punch.
I decorated the bag with felt fusion and twine.
I framed out the window on the bag with patterned paper.
I accented the inside of the bag with Halloween tissue paper.

This bag I used the Smiley Face Cartridge for the candy corn die cut.
I accented the bag with ribbon.
This bag I also accented the inside of the bag with Halloween tissue paper.


To wrap your candy cut your paper to size for wrapping.
In this instance I cut a 6" x 7" piece of cardstock.


For these Kit Kat mini candy bars I used a 6" x 6" cardstock to wrap them.
I applied double sided tape to three sides of the paper then wrapped them.

I took my Marvy paper crimper and crimped both ends of the candy wrapper.
I accented them with patterned cardstock and ribbon.


Pumpkin Box Treat Holder


 Pumpkin Box Treat Holder

Supplies:

Cricut Cartridge - Sweet Tooth - Pumpkin Treat Box - cut at 7".
Cricut Cartridge - Mother's Day Bouquet - Leaves - cut at 2".
For the stem I just rolled a small piece of paper into a tube and adhered it on with a glue gun.


Friday, September 16, 2011

Halloween Ghost Card


Halloween Ghost Card 

Card size 4-1/4 X 5-1/2

Supplies:

Ghost Stamp is from Peachy Keen called Trick-Or-Treat Ghost.
I used Divine Twine to stitch a border around the frame.
I poked the stitching holes with the Stampin Up Mat pack


Spooky Halloween Card


Spooky Halloween Card

Card Size - 4-1/4 X 5-1/2

Supplies:
Cricut Cartridge - Chic & Scary - Spooky Tag cut
Martha Stewart punch around the page spider set.
We R Memory Keepers Floss.

Monday, September 5, 2011

Making Fabric Flowers With Your Die Cut Machine Tutorial

Flower Tutorial


Here's the fall fabric flowers I made.
I'm going to show you how I made them.


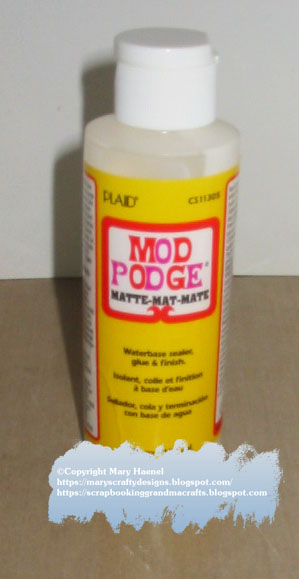
First I ironed on HeatnBond - Ultra Hold to the back of my fabric.


It is a 17x12 Sheet. I did have to iron the fabric first so it was nice and smooth.
You don't want any wrinkles, creases or bunched up fabric.
If that happens it won't cut right in your Die Cut Machine.

See how it makes it nice a stiff. You want your fabric stiff in order to cut it.
Some people use liquid stiffeners. I chose to use Heat n Bond.
Here you have to peel off the backing before you place it on the mat.
You can see the backing in the first picture.


Next I put my fabric on a super sticky mat.
You also want to make sure you put in a new blade in your machine.
The settings I used were pressure 5 and speed at 2 on my Imagine.


I cut the flower out at 4.5"
Here's the negative of the cut.


Here's the spiral flower.


I just took my stylus and rolled the flower toward me.
With the front side of the fabric up.
I don't want the heat n bond side to be showing. 


Now that I have it rolled. I'm going to let the flower loosen up.
Let it uncurl. You may have to fuss with it a bit to help it loosen up.

Now I have my flower loosened up to where I like it.

Hot glue the flower to the bottom circular part of the flower.


I think you can see it ok where I put the glue.


This is the finished flower


You can put what ever you want in the center of the flower.
The maroon flowers I didn't put a center in.
I think it looks great either way.


Sunday, September 4, 2011

Paper Flowers


 Paper Flowers

Supplies:

Close To My Heart Cricut Art Philosophy Cartridge - Flowers
Glass Pearls

Saturday, August 13, 2011

Candy Store Layout


Supplies:

Cricut Cartridge - Sweet Shop - Candy Store
Cricut Cartridge - Best Friends - Girls
Cricut Cartridge - Kate's ABC's - Dog
Cricut Cartridge - Bloom - Tree

Friday, August 12, 2011

Silk Screen Shirts With The Yudu


Supplies:

Cricut Cartridge - A Child's Year 
Cricut Cartridge - 3 Birds On Parade.
Provo Craft - Yudu Personal Screen Printer
Fabric Paint


Wednesday, July 13, 2011

Papa And Me Layout


 Papa And Me Layout

Supplies:

Cricut Cartridge Classic Font - The word And
Cricut Cartridge Country Life - For the words Papa, Me
Paper - K&Company - Garden Party Stack
I stamped the flourishes on the Title and background papers.

Tuesday, July 12, 2011

Birthday Layout


Birthday Layout

Supplies:


Cartridges:

Best Friends - Balloons - Cut relative size 4"
Yummy - Banner - Cut relative size 2"
Bubblegum Strips - Pattern Paper
Martha Stewart Border Punch


Birthday Layout


Birthday Layout

Supplies:

Cartridges:

Best Friends - Balloons - Cut relative size 4"
Yummy - Banner - Cut relative size 2"
Bubblegum Strips - Pattern Paper
Martha Stewart Punch

Easter Layout


Easter Layout

Supplies:

Cartridges:

Easter - Happy Easter - Cut at 3.1" relative size. Egg's Cut at 1.5" relative size.
Kate's ABC'S - Little Girl and Bunnies cut at 4" relative size.
Berries And Cream - Floral Mats
Imagine - White Decorative mats at 6.2" and 5.5"


Monday, July 11, 2011

Christmas Layout


Christmas Layout

A layout I made of my Granddaughter's 1st Christmas.

Supplies:

 K&Company - Tidings of Comfort and Joy Stack
 Snowangel cartridge. All cuts were cut at 2.5"


Birthday Layout


Birthday Layout

Supplies:

Cricut Cartridge  - Best Friends - Balloons - Cut relative size 4"
Cricut Cartridge  - Yummy - Banner - Cut relative size 2"
Cricut Cartridge  - Bubblegum Strips - Pattern Paper

Martha Stewart Border Punch

Monday, July 4, 2011

Fall Harvest Layout


Cartridges used:
Enjoy The Season - The squirrel  - 3.0"
Mother's Day  Bouquet - Leaves - 9.5" and 2.0"
I flood filled the leaves with pattern paper from Enjoy The Seasons.
Cricut Classic Font - Title - 2.0"