I Decorated My Cricut Explore with Vinyl!
This is my first vinyl project ever! I am happy with how it turned out.
The Creation Station was done in my own handwriting.
I wrote out Creation Station on a white piece of paper.
I scanned the handwriting into my computer.
I uploaded the image into Cricut Design Space.
I cleaned up the image. I saved it as a simple image.
I chose the vinyl setting on the Cricut dial.
It cut out beautifully. It was so simple.
The flower is from the Sophie Cricut Circle Cartridge.
I don't know why I haven't done more vinyl projects.
I guess I was uncomfortable trying something new.
I know I will be doing more vinyl projects in the future.
It was fun and easy to do!!
Happy Crafting!!
Mary
Quote
"Scrapbooking Is Your Own Personal Holiday"~~Sara~~
Showing posts with label Projects. Show all posts
Showing posts with label Projects. Show all posts
Saturday, March 8, 2014
Monday, February 17, 2014
Guys Craft Too!!
Chuck is helping Emma make wings for her Barbie doll.
Chuck prefers cutting by hand.
It turned out cute!
Chuck prefers cutting by hand.
It turned out cute!
Saturday, January 28, 2012
Valentine Heart Wreath
Valentine Heart Wreath
I bought this wreath at Walmart.
I decide to add my favorite bear cut to it to decorate it.
It was a really super fast and easy project to make.
Supplies:
Cricut Digital Download - Valentine Sweets - Bear Cut at 4"
I bought this wreath at Walmart.
I decide to add my favorite bear cut to it to decorate it.
It was a really super fast and easy project to make.
Supplies:
Cricut Digital Download - Valentine Sweets - Bear Cut at 4"
Thursday, December 29, 2011
Floating Christmas Ornament
Floating Christmas Ornament
Supplies:
Imagine Santa's Village - Santa cut at 1.139 W x 0.917H
Imagine Santa's Village - Deer cut at 0.694 W x 1.25 H
Trees from Camp out cartridge cut at 1.514 W x 1.375 H
Trees from Christmas Cartridge cut at 1.819 W x 1.361 H
This is a 3" clear plastic ornament. It comes in 2 sections for putting things inside.
I hot glued the pieces in the globe. I used Martha Stewart snow in the ornament.
Tuesday, December 13, 2011
Monday, September 5, 2011
Making Fabric Flowers With Your Die Cut Machine Tutorial
Flower Tutorial
Here's the fall fabric flowers I made.
I'm going to show you how I made them.
First I ironed on HeatnBond - Ultra Hold to the back of my fabric.
It is a 17x12 Sheet. I did have to iron the fabric first so it was nice and smooth.
You don't want any wrinkles, creases or bunched up fabric.
If that happens it won't cut right in your Die Cut Machine.
See how it makes it nice a stiff. You want your fabric stiff in order to cut it.
Some people use liquid stiffeners. I chose to use Heat n Bond.
Here you have to peel off the backing before you place it on the mat.
You can see the backing in the first picture.
Next I put my fabric on a super sticky mat.
You also want to make sure you put in a new blade in your machine.
The settings I used were pressure 5 and speed at 2 on my Imagine.
I cut the flower out at 4.5"
Here's the negative of the cut.
Here's the spiral flower.
I just took my stylus and rolled the flower toward me.
With the front side of the fabric up.
I don't want the heat n bond side to be showing.
Now that I have it rolled. I'm going to let the flower loosen up.
Let it uncurl. You may have to fuss with it a bit to help it loosen up.
Now I have my flower loosened up to where I like it.
Hot glue the flower to the bottom circular part of the flower.
I think you can see it ok where I put the glue.
This is the finished flower
You can put what ever you want in the center of the flower.
The maroon flowers I didn't put a center in.
I think it looks great either way.
Wednesday, April 6, 2011
Easter Treat Basket
Easter Treat Basket
Supplies:
Basket Size 2-1/2" x 3" x 4-1/2"
Cricut Cartridge - George and Basic Shapes
I designed the basket on the gypsy
Martha Stewart Deep Edge Flower Bed Punch
Saturday, January 29, 2011
Rose Topiary
I'm going to show you how to make this Rose Topiary.
First you will need a candle stick.
I purchase a package of 3 at walmart in the candle section.
Top View
Next you will need a 5" Foam Ball.
I also purchased this at walmart in the craft section.
Next you will need round Dowels.
I also purchased at walmart in the craft section.
Mark the dowel every 4" and cut.
You will have 3 pieces need to assemble the Topiary.
Next you will need floral tape and foam tape.
Using the Floral Tape wrap the 3 dowels together.
Next you will need your foam tape.
Wrap the bottom of the dowel with foam tape.
This will be the end that will stick into the candle holder.
The other end you will stick into the ball.
Place the wooden dowel into the candle holder.
Next push the ball onto the dowels.
Your are now ready to start assembling the Topiary.
You will need 19 paper roses.
You can learn to assemble them on this post
Adhere the roses to the ball using a hot glue gun.
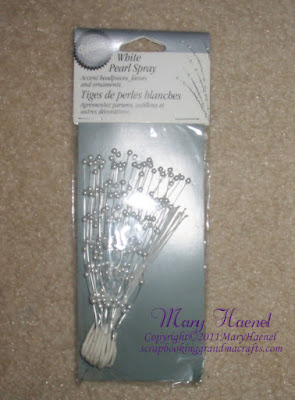
Accent Topiary with Whiter Pearl Sprays.
You will need Tulle to make tulle tuffs in between the roses.
Adhere the tuffs of tulle with a hot glue gun.
As you are adding roses around the ball you will
add tuffs of tulle around each rose to fill in the spaces.
The butterflies are cut at 1-1/2" from the
Martha Stewart Elegant Cakes Cricut Cartridge.
Adhere to ball with hot glue gun.
How To Make A Paper Rose
When I make flowers I like to use hot glue guns to assemble them.
It dries quickly and makes for a sturdy flower.
To make a rose using your gypsy you want to select any image that will make a good petal, leaf and base of the flower. See diagram below to start your cut file.
Create A Cut File
On Your Gypsy make a cut file with the above images.
Cartridges - Gypsy Font, Mother's Day Bouquet.
Cartridges - Gypsy Font, Mother's Day Bouquet.
Preparing The Petals
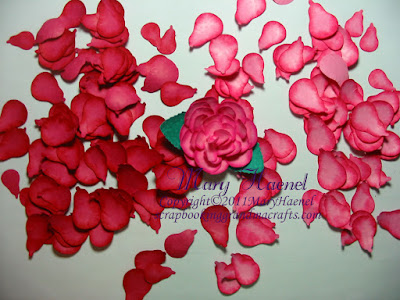
You Need 12 1-1/2" Petals, 9 1-1/4" and 4 1" petals
I used my quick stick and foam pad.
I rubbed the petal in a circular motion to curl the petal.
Don't worry about the folds and wrinkles it adds to the texture of the flower.
Assembling The Rose
Next ink the edges of the petal.
Layer the 2 cross shape petals for the base of the rose.
Adhere with hot glue.
Next adhere 6 1-1/2" petals with hot glue to the base of the flower.
Next adhere with hot glue and layer the next 6 petals.
Place this row of petals so they are inbetween the bottom petals met.
Next Layer 6 1-1/4" petals in the same manner as above.
Next layer and adhere with hot glue the last 3 petals of the flower.
Creating The Center Of The Rose
Place a tweezers at the side of the petal.
Next roll the 1" petal around the tweezers.
This will be the center of the rose.
With the last 3 1" petals place the tweezers in the center of the petal.
Next fold the sides of the petal around the tweezers.
This will create a bend in the petal to layer around the center of the rose.
Your 4 1" petals should look like this.
Next put a bead of hot glue in the center of a petal.
Place the center of the rose on top of the petal.
Next adhere the other 2 petals to the center of flower.
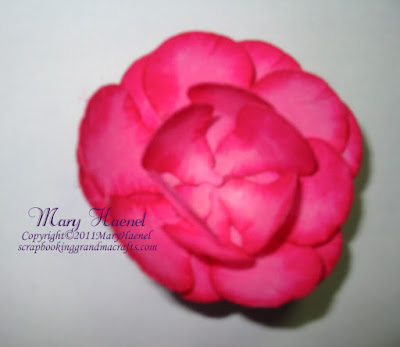
Your rose should look like this when completed.
Next adhere the leaves to the side of the rose with hot glue.
Your first rose is done. Now your ready to make some more.
Happy Crafting
Mary
Subscribe to:
Comments (Atom)


