Quote

"Scrapbooking Is Your Own Personal Holiday"~~Sara~~


Showing posts with label Home Decor. Show all posts

Friday, February 24, 2017

Lily Wreath

Lily Wreath
This is my granddaughter's birthday present.
She wanted a wreath for her bedroom.
These are the colors she chose.
The yarn is Lion Brand Wool-Ease Thick and Quick Yarn. The color of the yarn is 106 Sky Blue. I wrapped the yarn around a 14" Floracraft Styrofoam Extruded Wreath with  UPC white.
I cut the Lily flowers out with Crafter's Companion - Sheena Perfect Partners metal die - Victorian Floral Lily.  I used wool felt for the flowers.
I embellished the center of the Lilies with Jolee's Boutique - Pearl and Gem Clusters.
 

Friday, August 21, 2015

Vases Made From Mason Jars


Vases Made From Mason Jars


Supplies:
Waverly Chalk Paint
Varnish
Mason Jar
Burlap Ribbon
Bakers Twine
Hemp
Trinkets

Directions:
Paint jar with Moss Green Waverly Chalk Paint and let dry.  Dry brush brown Waverly chalk paint over the green paint and let dry.  Seal the paint with varnish and let dry. Wrap ribbon around the jar and adhere with hot glue. Tie hemp and twine around the neck of the jar.  Tie trinket onto the middle of the jar having it hang over the ribbon.

Tuesday, August 18, 2015

Painted Mason Jars For Fall

Painted Mason Jars For Fall

Please read the Instructions below:
You place the vinyl on the outside of the jar.
You paint your jar. Letting the paint dry for each layer. Then when the jar is dry add varnish. Letting the varnish dry between each layer.
Remove vinyl after the jar has dried completely.
I used an X-acto knife to cut around the vinyl shape then peeling it off the jar.
I used Waverly Chalk Paint. Then I sealed it with Waverly clear matte varnish.
The paints and varnish can be purchased at Walmart.
2 different techniques were used with each jar. The jar with the maple leaf was painted with a solid color paint. The jar with the acorn I applied several layers of paint to distress it. Giving it a more woodsy feel to it. I used the dry brush technique to apply 3 different colors of paint onto the jar with the acorn.
The candles are battery operated. I'm in the process of making tags and die cuts to hang on the jars.

Happy Crafting!!
Mary


Saturday, December 20, 2014

Decorating Glass Blocks

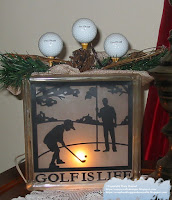
I have made a few glass blocks this holiday season to give as gifts.
I have a Tip Sheet I made up to help you start decorating glass blocks.
Click on picture to download the PDF instruction sheet.

https://app.box.com/s/fw5incbswytygzhomxs2


Happy Crafting!!
Mary

Sunday, August 24, 2014

Chalkboard Kitchen Plaque

Chalkboard Kitchen Plaque
I've been busy again. I made a couple more chalkboard plaques for my daughter's kitchen. 
Supplies:
-Creative Memories Stork's Delivery - Font
-Cricut Cartridge Country Life - Utensil images
-Cricut Cartridge Heritage - flourish
-Cricut Cartridge Disney Pooh & Friends - Chef Hat
-Silhouette vinyl
-12" long Chrome platters
-Rust-oleum Chalkboard paint
-Twine
-Crop-A-Dile - to punch holes in the platter for hanging.
-Cricut Explore and Design Space design Software - To create and cut the images and lettering for the plaque.

Mary


Saturday, August 23, 2014

Chalkboard Plaque - A Home Is Built Of Love and Dreams

A Home Is Built Of Love and Dreams
I've been busy making another chalkboard plaque. I am really enjoying making these plaques.  This Plaque is a gift to my daughter.

Supplies:
-Rust-oleum Chalkboard paint
-Chrome platter
-Silhouette Vinyl
-Creative Memories Stork's Delivery Cartridge for the font.
-Burlap Ribbon
-Twine to hang the plaque
-Bow-it-all - to tie the bow
-Crop-A-Dile - to punch holes in the plaque for hanging
-Cricut Explore and Design Space design Software - To create and cut the images and lettering for the plaque.


Saturday, August 16, 2014

Chalkboard Plaque - Home Is Where The Heart Is


Home Is Where The Heart Is
I've been working on making chalkboard plaques. This is my first one with more to come.  This one is for my dinning room.

Supplies:
-Rust-oleum Chalkboard paint
-Chrome platter
-Silhouette Vinyl
-Creative Memories Stork's Delivery Cartridge for the font.
-Burlap Ribbon
-Twine to hang the platter
-Bow-it-all - to tie the bow
-Crop-A-Dile - to punch holes in the platter for hanging
-Cricut Explore and Design Space design Software - To create and cut the images and lettering for the platter.

Friday, March 29, 2013

Teapot Plaques and Decorative Holders

Well I had to go back to the drawing board. My daughter liked the teapot plaque so much she asked me if I could do another one. Only flip the Teapot the opposite direction. I said I could do this.
Then she asked if she could have my decorative holder. I said I could make another one.
I'm just happy she liked them so much. I do have to admit 2 teapots are better then one.
I had my GD help me with the 2nd one. She really enjoyed painting the teapot plaque.
Here is my daughter's house warming present. 2 teapot plaques and a decorative holder.
I think these 3 pieces look good on stands too.  So now it is settled this is my daughter's house warming present!!!  She is very grateful and appreciative that I made these for her.


These decorative holders I made for myself. LOL
I'm keeping them for decorative Craft room storage!!
I'm might bling up the 2 side holders more. I just have decided yet.
I know sometimes when I post things on my blog.
I see things in a different light and make some changes.
So don't be surprised if you see me posting more about these pieces. LOL


Enjoy!!!!!

Mary

Thursday, March 28, 2013

Decorative Holder


Decorative Holder

Supplies:

I purchased this candle holder at Michael's.
The beads, ribbon and lace I purchased at Walmart.
Butterflies I purchased at Michael's.


Teapot Wall Plaque


 I made my daughter a house warming present. She loves teapots. So I found this wood teapot at Michael's. I painted it with acrylic paint and sprayed it with a glaze. Then embellished it with a vine, flowers and butterflies.


Sunday, March 24, 2013

Princess Wall Plaque

I made a Princess wall plaque for my Granddaughter's new room.
She will be moving into a new house soon!! This is my house warming present for her new room.
I hope she likes it!!!


 I painted the plaque with acrylic paint. I used mod podge to adhere the pieces to the plaque.

It is 11-3/4 wide x 7-1/2 height.

It is a wood plaque that I painted pink. I got it at Michael's.

Cricut Cartridges Used: Once Upon a Princess - for the princess cut. Cut Size 1-1/2".

I used Hello Kitty Font for her name. Cut at 1"

The butterflies are from Ek Success small punches.

The Disney figures are chipboard I used from a Disney scrapbook kit.

Saturday, January 29, 2011

Rose Topiary

I'm going to show you how to make this Rose Topiary.


First you will need a candle stick.
I purchase a package of 3 at walmart in the candle section.


Top View


Next you will need a 5" Foam Ball.
I also purchased this at walmart in the craft section.


Next you will need round Dowels.
I also purchased at walmart in the craft section.


Mark the dowel every 4" and cut.

You will have 3 pieces need to assemble the Topiary.

Next you will need floral tape and foam tape.

Using the Floral Tape wrap the 3 dowels together.

Next you will need your foam tape.


Wrap the bottom of the dowel with foam tape.
This will be the end that will stick into the candle holder.
The other end you will stick into the ball.

Place the wooden dowel into the candle holder.


Next push the ball onto the dowels.


Your are now ready to start assembling the Topiary.


You will need 19 paper roses.
You can learn to assemble them on this post

Adhere the roses to the ball using a hot glue gun.


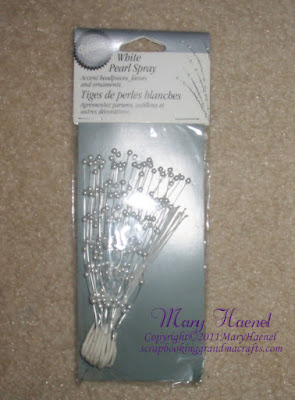
Accent Topiary with Whiter Pearl Sprays.


You will need Tulle to make tulle tuffs in between the roses.
Adhere  the tuffs of tulle with a hot glue gun.
As you are adding roses around the ball you will
add tuffs of tulle around each rose to fill in the spaces.
The butterflies are cut at 1-1/2" from the
 Martha Stewart Elegant Cakes Cricut Cartridge.
Adhere to ball with hot glue gun.


Thursday, August 5, 2010

Ghost Centerpiece and Treat Cups

                  
Ghost Centerpiece and Treat Cups

Supplies:

Cartridges used were:

Paper Doll Dress up -  Ghosts.
Small Ghosts -  4.65" Height and 2.57" Width
Large Ghost - 14.65" Height and 8.09" Width on Gypsy
Happily Ever After -3" Pumpkins
Don Juan - Weld Happy Halloween on Gypsy
Overall size of welded words - 7.54" width X 4.03 Height.
1-1/2" letter size

Instructions for the Treat box behind the pumpkins:

Treat Cup Instructions:

Cut 4 strips of paper 3" wide X 10" long, Score length wise at 1-1/2 inches
Next Score width at every 2". Cut in1-1/2" on the 3" strip of paper on the scored lines to center length of score line.
On one side. The other scored lines will be folded on the other 1/2 of the 3" strip of paper.
Fold on score lines and adhere with adhesive to form box. Embellish with Grass and Treats in box.