A Home Is Built Of Love and Dreams
I've been busy making another chalkboard plaque. I am really enjoying making these plaques. This Plaque is a gift to my daughter.
Supplies:
-Rust-oleum Chalkboard paint
-Chrome platter
-Silhouette Vinyl
-Creative Memories Stork's Delivery Cartridge for the font.
-Burlap Ribbon
-Twine to hang the plaque
-Bow-it-all - to tie the bow
-Crop-A-Dile - to punch holes in the plaque for hanging
-Cricut Explore and Design Space design Software - To create and cut the images and lettering for the plaque.
Quote
"Scrapbooking Is Your Own Personal Holiday"~~Sara~~
Saturday, August 23, 2014
Saturday, August 16, 2014
Chalkboard Plaque - Home Is Where The Heart Is
Home Is Where The Heart Is
I've been working on making chalkboard plaques. This is my first one with more to come. This one is for my dinning room.
Supplies:
-Rust-oleum Chalkboard paint
-Chrome platter
-Silhouette Vinyl
-Creative Memories Stork's Delivery Cartridge for the font.
-Burlap Ribbon
-Twine to hang the platter
-Bow-it-all - to tie the bow
-Crop-A-Dile - to punch holes in the platter for hanging
-Cricut Explore and Design Space design Software - To create and cut the images and lettering for the platter.
Friday, July 4, 2014
4th Of July Banner
 4th Of July Banner
Happy 4th of July everyone!! Hope everyone has a fun and safe holiday!
I've been working on this banner and finished it just in time for the 4th Of July!
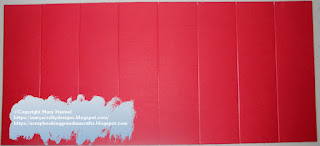
Instructions: Cut a piece of paper 5" wide and 11" long.
Score the paper every 1-3/8"
Fold the paper so the 2 ends are facing up. The 3 center pieces will be folded up.
So you will have 3 peaks and 4 valleys.
Staple the flower in the middle. Then Cut an angle on each end of the paper.
Lay the paper with the 3 peaks facing away from you then cut the angles.
This is how it will look from the top view.
Bring the 2 end pieces together and glue to form a half flower.
Bring the other 2 ends together and glue to form the full flower.
The stars were cut with Cricut Design Space.
The star is cut from Cricut fonts and Basic Shapes cartridge.
They were cut 2" wide by 1.9" high.
I used the star shadow to decorate the banner.
Saturday, June 7, 2014
Sunday, May 18, 2014
Pyramid Treat Box
Pyramid Treat Box
I made some pyramid treat boxes for 4th of July.
I decorated them so they could be used for Memorial Day or Independence Day.
You can decorate them for any occasion you want.
Supplies:
Cricut Cartridge: Independence Day - The Star burst in the center triangle box.
Cricut Cartridge: Art Philosophy - The star cut on the 2 triangle boxes on the ends.
Saturday, May 3, 2014
Golf Addict Treat Box
I'm celebrating National Scrapbook day by crafting.
Supplies:
The cap is an svg file I purchased from svgcuts.com.
The phrase golf addict is from the Cricut Cartridge Sports Mania.
Happy NSD!!
Mary
Sunday, March 30, 2014
April Showers Card
April Showers Card
Card Size: 5-1/5"x8-1/2"
Supplies:
Cricut Cartridge: A Child's Year - Card base
Cricut Cartridge: Create A Critter 2 - Tulips
Cricut Writing Font: Creative Memories - Tiny Treasures - Sweet Pea
Subscribe to:
Posts (Atom)


