Quote

"Scrapbooking Is Your Own Personal Holiday"~~Sara~~


Friday, July 4, 2014

4th Of July Banner

4th Of July Banner
Happy 4th of July everyone!!  Hope everyone has a fun and safe holiday!
I've been working on this banner and finished it just in time for the 4th Of July!


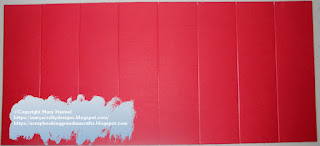
Instructions: Cut a piece of paper 5" wide and 11" long.
Score the paper every 1-3/8"


Fold the paper so the 2 ends are facing up. The 3 center pieces will be folded up.
So you will have 3 peaks and 4 valleys.


Staple the flower in the middle. Then Cut an angle on each end of the paper.
Lay the paper with the 3 peaks facing away from you then cut the angles.


This is how it will look from the top view.


Bring the 2 end pieces together and glue to form a half flower.


Bring the other 2 ends together and glue to form the full flower.

The stars were cut with Cricut Design Space.
The star is cut from Cricut fonts and Basic Shapes cartridge.
They were cut 2" wide by 1.9" high.
I used the star shadow to decorate the banner.
Sunday, May 18, 2014

Pyramid Treat Box


Pyramid Treat Box

I made some pyramid treat boxes for 4th of July.
I decorated them so they could be used for Memorial Day or Independence Day.
You can decorate them for any occasion you want.

Supplies:

Cricut Cartridge:  Independence Day - The Star burst in the center triangle box.
Cricut Cartridge: Art Philosophy - The star cut on the 2 triangle boxes on the ends.

Saturday, May 3, 2014

Golf Addict Treat Box


Golf Addict Treat Box

I'm celebrating National Scrapbook day by crafting.

Supplies:

The cap is an svg file I purchased from svgcuts.com.
The phrase golf addict is from the Cricut Cartridge Sports Mania.

Happy NSD!!

Mary

Sunday, March 30, 2014

April Showers Card


April Showers Card

Card Size: 5-1/5"x8-1/2"

Supplies:

Cricut Cartridge: A Child's Year - Card base
Cricut Cartridge: Create A Critter 2 - Tulips
Cricut Writing Font: Creative Memories - Tiny Treasures - Sweet Pea


Saturday, March 29, 2014

Cricut Design Space - Writing with Cricut Fonts

Cricut Design Space - Writing With Cricut Fonts
I made a video to go along with the PDF download of which fonts have writing style in Cricut Design Space software.
This video gives step by step instructions on how to write with Cricut Fonts In Cricut Design Space.


There is also a list in Cricut Design Space that list the writing fonts.
See picture below.


PDF Download: https://app.box.com/s/pfli09srpra6toq...

Tuesday, March 25, 2014

Anna Griffin's Book Emboss, Cut & Create


Anna Griffin's Book Emboss, Cut & Create

I just received Anna Griffin's Book - Emboss, Cut & Create.
Oh my gosh is this book ever awesome!!
There are tips, tricks and projects to make.
I feel like I was let in on Anna's design secrets!!
It goes through how she inks the embossing folders.
To how she does all of her other techniques in card making.  It is a must read book!

Happy Crafting!!
Mary

Sunday, March 23, 2014

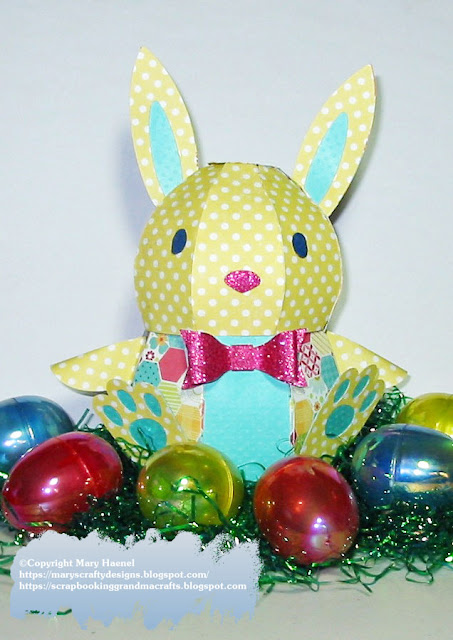
Easter Bunny Treat Holder


I purchased the svg file from svgcuts.com.
It was from the Bunny Hop Kit.

Saturday, March 15, 2014

Making Monograms

I made some Monograms!!


The H monogram was made with Creative Memories Stork Font cartridge.
I added the flourishes and they can be found on the Anna Griffin Soiree Lettering Cartridge.
The colors for this monogram are Dark blue, Light blue and beige background.


The L monogram was from the Anna Griffin Soiree Lettering Cartridge.
The flourish is from Gypsy Font cartridge on the left.
The leaves are from French Manor cartridge on the right
The colors for this monogram are purple, pink and blue background.

Happy Crafting!!

Mary


Friday, March 14, 2014

I Love Ewe Card

Yes, I have been playing with my Cricut Explore and Design Space again.
I am just loving this new machine. I know I've said it before. I just do. LOL


I designed this in Cricut Design Space.
I wrote first on the card.
Then I cut the Sheep fur, eyes and nose.
Then I cut the heart shapes out.
I did this by hiding the other contours of the design so only the shapes I wanted cut out.
I enlarged, duplicated and welded the back ground scallop card for the card base.
This card can be found on the Cricut Cartridge Spring Holiday Cards.

Happy Crafting!!

Mary

St. Patrick's Day Feeling Lucky Card

I made 3 different versions of this card.


The card on the left I wrote I feel Lucky with the Explore. I filled it in with stickles.  
The 2 posts on each side of the pot of gold I wrote and cut.
The pot of gold I fussy cut 

The center card I cut out as the original images.
I cut it in green and then black and yellow.
Then I fussy cut the pieces and adhered them to my card.

The card on the right I did the same as the card on the left.
Except I fussy cut the pot of gold differently.

The Cricut cartridge you can find this card on is Spring Holiday Cards.

Happy Crafting!!

Mary

Wednesday, March 12, 2014

Chalkboard Signs

I made some Chalkboard Signs with the Cricut Explore and Design Space.
I am having so much creating embellishments with this machine and software.
I was experimenting with different colors and fonts to see which I liked best.


The label is from Cricut cartridge lacy labels. 
The fonts I used were Cricut Alphabet and Chalkboard fonts.

Mary

Tuesday, March 11, 2014

Easter Card In A Box


 I've seen a lot of Card In A Box cards on Facebook. So I had to try one out myself.
 This is a Lori Whitlock svg file.


 Happy Crafting!!

Mary


Saturday, March 8, 2014

I Decorated My Cricut Explore with Vinyl

I Decorated My Cricut Explore with Vinyl!
This is my first vinyl project ever! I am happy with how it turned out.


The Creation Station was done in my own handwriting.
I wrote out Creation Station on a white piece of paper.
I scanned the handwriting into my computer.
I uploaded the image into Cricut Design Space.
I cleaned up the image. I saved it as a simple image.
I chose the vinyl setting on the Cricut dial.
It cut out beautifully. It was so simple.
The flower is from the Sophie Cricut Circle Cartridge.
I don't know why I haven't done more vinyl projects.
I guess I was uncomfortable trying something new.
I know I will be doing more vinyl projects in the future.
It was fun and easy to do!!

Happy Crafting!!

Mary

Saturday, March 1, 2014

Anna Griffin Name Tag and Treat Bag

I made Anna Griffin Name Tags to Match the Treat Bag I made yesterday. It is in the Make It Now projects. You can customize the project to fit your needs. I customized the file to write the names on the tags then cut in 3 layers on one mat. The font I used was Storybook.
I added some pearls and ribbon to dress it up.

Enjoy!!

Happy Crafting!!

Mary

Tools I purchased to use with Cricut Explore

These are the tools I purchased from HSN to use with my Cricut Explore.
The tool kit was shown as one set. But, when I received the tool kit it came as the tool kit with the Scoring tool in separate packaging. I also bought the Metallic Pen set.  I really like the new tool kit.
I wasn't going to get it but the tools are really nice.


Happy Crafting!!

Mary


Friday, February 28, 2014

Thank You Card And Anna Griffin Treat Bag

 I made in the Make It Now project in Cricut Design Space.
I'm having a ball playing with my Cricut Explore. There is so much to do with this machine.


Anna Griffin Bow and Treat Bag
What can I say I just love the Anna Griffin images that came with the Explore.
This was just one of many reasons why I purchased the Explore.

My first intricate cut using the Cricut Explore

My first intricate cut using the Cricut Explore. This is an Anna Griffin doily. It cut beautifully! It is 6-1/2". It is a beautiful cut!


~Mary

Thursday, February 27, 2014

My Cricut Explore Arrived Today!!!

My Cricut Explore arrived today!! I am so excited! So far I like what this machine can do. I'm very happy with the Design Space software. I bought a rolling utility cart to house my machines. Since the Cricut Explore requires an internet connection. I can just roll my machine over to my computer and cut away. I really like the set up I have with using a rolling cart. I did have to call customer support to get up and running. Somehow I missed the landing page to set up and register the Explore. After I registered the Explore I was able to access the Anna Griffin Images that came with the HSN Cricut Explore package. I made some test cuts and I really like this machine. I am very excited to have it!!


~Mary

Monday, February 17, 2014

Guys Craft Too!!

Chuck is helping Emma make wings for her Barbie doll.
Chuck prefers cutting by hand.
It turned out cute!


Saturday, February 1, 2014

Valentine's Day Card


Valentine's Day Card

I used Spellbinders Shapeabilities Lace Heart for the center heart.
I used 4 different Martha Stewart Punches to make the smaller hearts.

Monday, December 30, 2013

Awesome Walmart Find!!


I went to Walmart to buy some containers for organizing.  I came across this awesome Washi Tape!!!  I can see me using this on all kinds of projects!!
I couldn't pass this up.
It would be good for Birthdays, Halloween, remolding the house or craft room.
I am so Super excited to find this at Walmart. Our Walmart is limited in what they have.
This wasn't even by the craft section. It was on a end cap near the candles.


Wednesday, December 25, 2013

Merry Christmas!!!

Wishing all my readers a Very Merry Christmas!!!

Thank you for following me!! I am so thankful for all of your inspiring comments!!

Sunday, December 1, 2013

Jolly Fun Layout


Jolly Fun Layout

Supplies:

Silhouette Cameo
Jolly Fun word phrase by Samantha Walker Design ID #13454
Flourish Poinsettia corner by Snapdragon Snippets  Design ID #36528
The printed Santa is a Santa by Lettering Delights Design ID #23146
The poinsettia was made from a Stampin Up flower punch

Christmas Layout


December Journal


Merry & Bright Layout


Merry & Bright Layout

Supplies:

Silhouette Cameo
The poinsettia is a flourished poinsettia corner by Snapdragon Snippets  Design ID #36528
The Santa is a Santa reading list by Jamie Koay Design ID #36371
Merry & Bright  by Sarah Hurley Design ID #36002
The poinsettia was made from a Stampin Up flower punch


Saturday, November 30, 2013

Look Who Showed Up At My House!!!!


This sneaky little girl showed up at my house today.
It's an girl Elf On The Shelf!!  I'm going to do this with my Granddaughter this year.
It should be lots of fun. Now for a name.....hmmmmm
I'm not good at giving names. Anyone have any ideas on what to name her?


~Mary

Sunday, September 29, 2013

Homemade clip it up shoe rack

A friend told me about how you can make your own clip it up with a shoe rack.
So I decided to try it out. I just love it!!!
It has basket storage and you can clip up scrapbook embellishments for easy access.
I decorated it up to match my room and love how it turned out!!
I used plant liners in the basket part to keep my embellishments in there without falling out.
I cut a hole in the middle and put the liner in as I was  putting together each tier.
I also had to trim down the liner to the height of the basket.
It was easy to do.
I am going to use one of the baskets for my collection of washi tape.
I'm still trying to decide what items I want on the part where you can clip it up.
I like that it is decorative and adds  interest to my room.

Sunday, September 22, 2013

Halloween Placemats

My 5 yr. old  granddaughter and I made some Halloween placemats. Here are the results.
She had the idea of the haunted house center and I had the idea of the pumpkin center.
I got all the pieces cut out and she helped me adhere them onto the paper.
We made 8 placemats. My granddaughter wanted green and purple placemats.
I wanted Orange and purple placemats. It really was fun working together with her.
I really enjoyed helping her bring her ideas with the haunted house to life.


The doilies were made with the Martha Stewart Spider circle punch.
The center is a 12" circle and the corners were an 8" circle divided into 4 corner pieces.
The Large bat is an EK Success bat punch (shown by the pumpkin).
The bats by the haunted house are from the Martha Stewart bat and EEK punch.
The witch on the broom is the Martha Stewart witch punch.
The black cat is also a Martha Stewart Punch.
The pumpkins in the corner are from a Martha Stewart large border punch.
I cut the pumpkins out from that punch.
The Ghosts are from Paper Dolls Cricut cartridge (cut at 3").
The pumpkin is from Create a Critter 2 Cricut cartridge(cut at 5").
The haunted house is from the Monster Bash Cricut cartridge (cut at 5").
I used my Xyron Creatopia to laminate the placemats.
~Mary


Thursday, September 5, 2013

It's A Birthday Party Layout


It's A Birthday Party Layout

Supplies:

October Afternoon Cakewalk Collection.
Martha Stewart Balloon punch

Wednesday, September 4, 2013

Zoo Layouts


Zoo Layouts


I made some layouts of our trip to a zoo. There are too many layouts to share all the directions too.
I made the path going through the park so when you line up all 16 layouts that the path continues on from page to page. It looks really neat once you lay them out to see the full spread.


Supplies:


Cricut Cartridge - Animal Kingdom - goat, turtle, Dog

Cricut Cartridge - Easter 2010 - Bunny

Cricut Digital Download - Monkey that I print and cut with the Imagine.

Jolee's stickers - Peacock 

Silhouette Cameo - ram and mountain goat

Cricut Cartridge - Create a Critter - grass and trees 

Cricut Cartridge - Designer Calendar to weld a Calendar grid for the fencing.

Squares from the walking path are from the center of the fencing.


Tuesday, September 3, 2013

My New Disney Chair Layout


My Granddaughter got a new Disney chair. This was a big deal at out house. It took her a bit to get used to sitting in it. Now she is a pro!!
I used a Martha Stewart border punch to frame out the pictures.
I like to scrap everyday things as well as the important events.

For the font I used Mickey Font and Jubilee Cricut cartridges.

I used Disney stickers to embellish the layout!

Mary